
Edit
Creating a New Document
To have an efficient documentation process in Git, the following prerequisites must be set before beginning to work on a new document:
-
Pre-commit hook (to prevent accidental commits directly on main branch)
-
Git ignore (to ignore certain files when making a commit)
-
Git LFS (to store large files in LFS server)
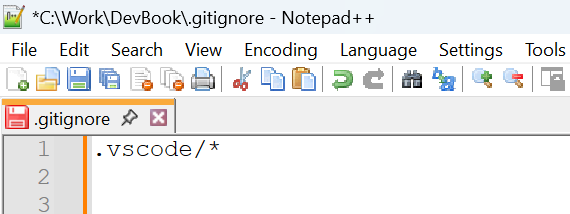
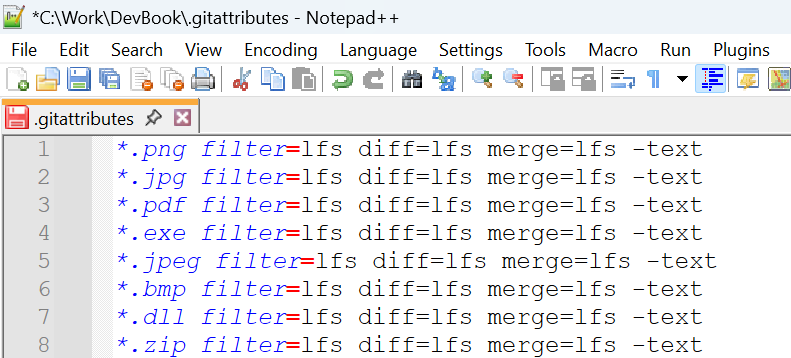
Create .gitignore and .gitattribute (for LFS) files and place these files in the root folder of a new document. Refer to sample images below:
Set Up Folder Structure
-
Folder structure is essential for creating a new document. You can create as many folders as needed. Each folder and subfolder represents a chapter and subchapter.
-
Following files are needed in the newly created folder while creating a document.
-
manifest.txt
-
contents.txt
-
index.adoc
-
img folder
-
| Use the exact file names mentioned above. |
Required Files
-
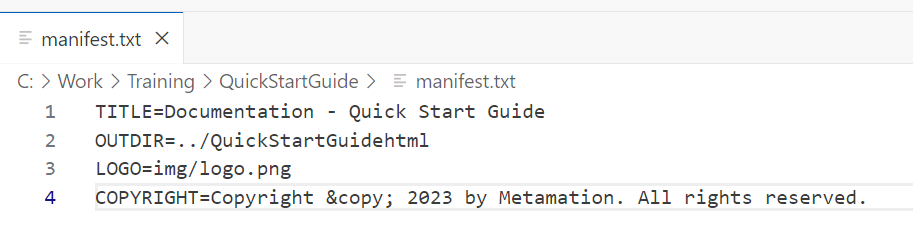
manifest.txt file: The manifest.txt file sets up the Logo, Title, and Footer sections for the documentation project. This is a one-time setup file and is not required in each subfolder. Here is an example of what the manifest.txt file contains:
-
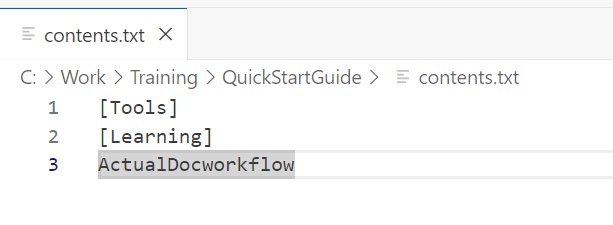
contents.txt file: Each folder contains a contents.txt file. This file lists the order in which the .adoc files in that folder appear in the Content Tree on the left. It simply lists each source .adoc file and each subfolder to be considered. Files are represented by their names (without the .adoc extension), while folders are represented by names enclosed in square brackets. Here is an example of contents.txt file:
-
index.adoc file: Each folder also should contain an index.adoc file that provides the root content for that folder. It acts as a homepage, along with additional chapter or subchapter .adoc files. Typically, this is a short introduction to the topics discussed in this section of the documentation. You can also include links to the topics in this chapter.
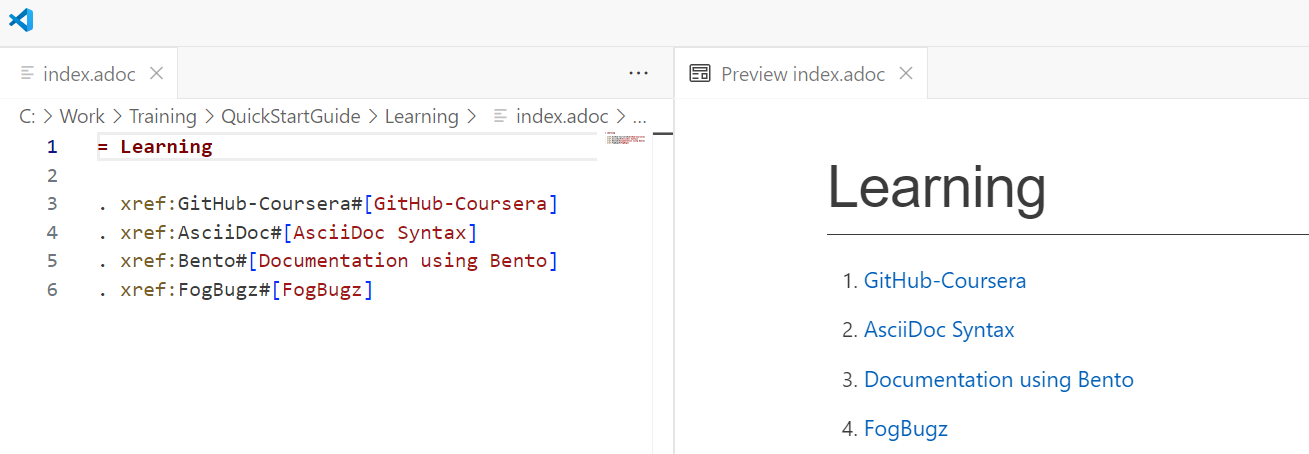
-
img folder: Every folder and subfolder must have an img folder for images, logos, icons. Make sure images are placed in the respective img folders and check for the naming convention.
| Render is highly case sensitive. Make sure you enter the exact image name under image syntax. Also, make sure to save all images in .png format. To avoid confusion, keep the image names entirely in lower-case. |
Creating .adoc and .txt Files
-
Navigate to the C:drive → Work folder.
-
In the Address Bar, type cmd to open the Command Prompt.
-
In the Command Prompt, type code . to open Visual Studio Code.
-
Open File Explorer and hover the mouse pointer over the Explorer panel to see New file and New Folder options.
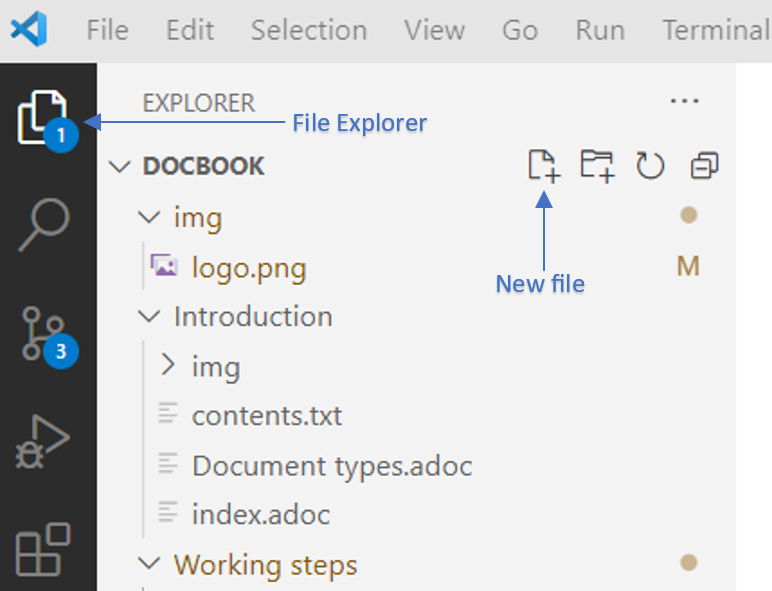
-
Click New file:
-
For .adoc file, type index.adoc (home page) and other .adoc files as required.
-
For .txt files, create the .txt files specified in the Set Up Folder Structure.
-
| Each folder can have multiple .adoc files depending on the content requirements. Each folder and subfolder has a contents.txt file, but manifest.txt is a one-time setup file and is not required in each subfolder. |
Procedure for Creating a New Document
-
Navigate to the C:drive → Work folder.
-
Create a new document folder and name it after the product.
When creating a new document folder, make sure that the following Prerequisites are met. PREREQUISITES:
-
Make sure precommit hook is deployed.
This is to make sure no one is allowed to work or push code directly into main branch. -
Add .gitattributes and .gitignore files.
-
-
In the address bar of the newly created document folder, type
cmdto open the Command Prompt. -
In the Command Prompt, type
code .to open Visual Studio Code. -
Create and verify that you have all the necessary files listed in the Set Up Folder Structure with the required content.
-
In the .adoc file, write content in Visual Studio Code using the AsciiDoc syntax format.
-
While writing content in Visual Studio Code, you can use the preview option to check the .adoc file’s overview.
-
After adding your content in the .adoc file, save the file.
-
In the Command Prompt, type
bento .to compile the .adoc files.-
During the Bento compilation, a new HTML folder will be created for the document folder.
-
Navigate to the HTML folder, review the HTML files.
-
-
In Command Prompt, type
git statusto check the modified files. -
Type
git add .to stage the changes. -
Type
git commit -m "write description here"While writing the commit message description, follow this convention Case 12345: Your message -
Type
git push-
Follow the Command Prompt instructions to add the new branch (one-time process). The following instruction will be displayed when the
git pushcommand is entered.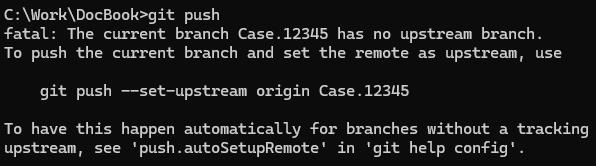
-
To push the current branch, copy and paste this in Command Prompt
git push -set-upstream origin Case.12345This git push -set-upstream origin Case.12345command pushes your local branch to the remote repository and sets the upstream (tracking) branch. This means that future git push and git pull commands will default to this remote branch.
-
-
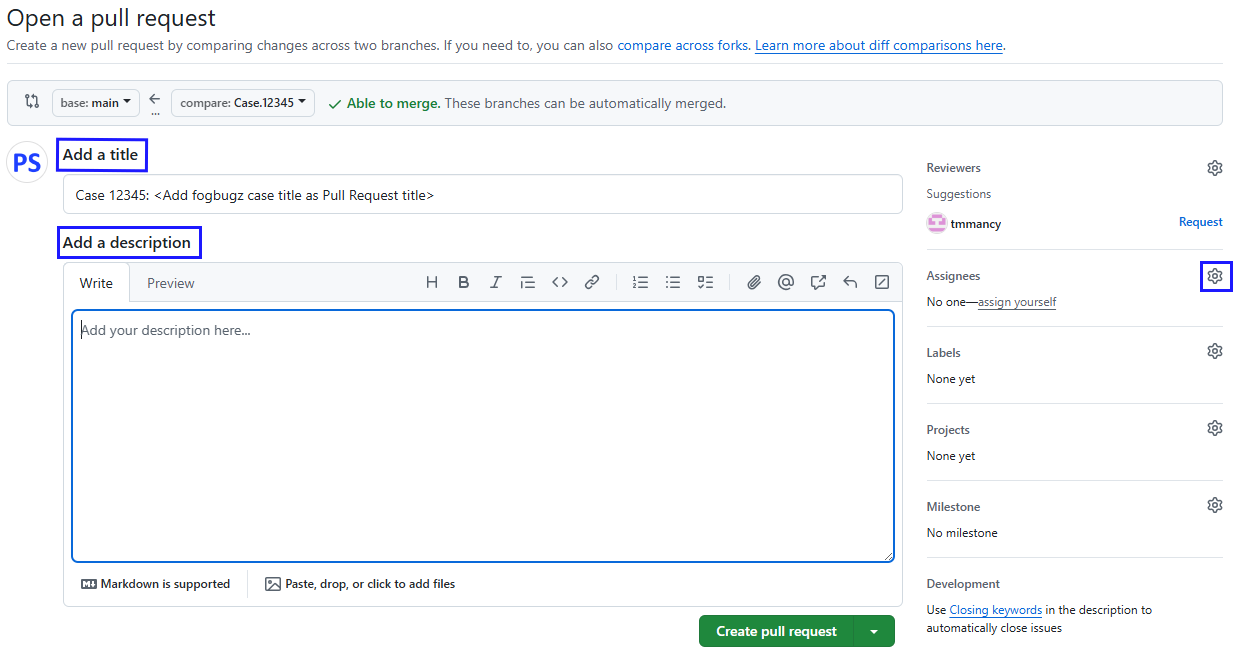
Next, go to GitHub's respective repository in your browser and click on Compare & pull request.

-
Add a title and a description to create a new pull request. Follow the below convention,
-
Title: Case 12345: <Add FogBugz case title as pull request title here>
-
Description: Add the commit message description here, along with any details that you want to notify to the assignee.
-
-
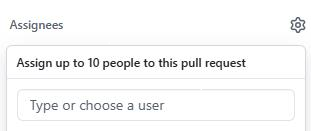
To select the assignees, click the gear icon to view the list of people. Then, click 'Create pull request' to proceed.
-
Once assigned, the assignee begins to review the changes.
| To know more on the review process, please refer proofread. |
Editing an Existing Document
-
Navigate to C: drive → Work folder to clone the repository.
-
Initiate Command Prompt.
-
Type
git clone <repo link>-
Wait for the clone action to complete.
-
-
Type
cd <folder name>to navigate inside the cloned folder.By default, only the main branch of a repository will be cloned. -
Create a new branch to edit your changes.
-
Type
git sw -c Case.12345 -
Type
code .to open Visual Studio Code.-
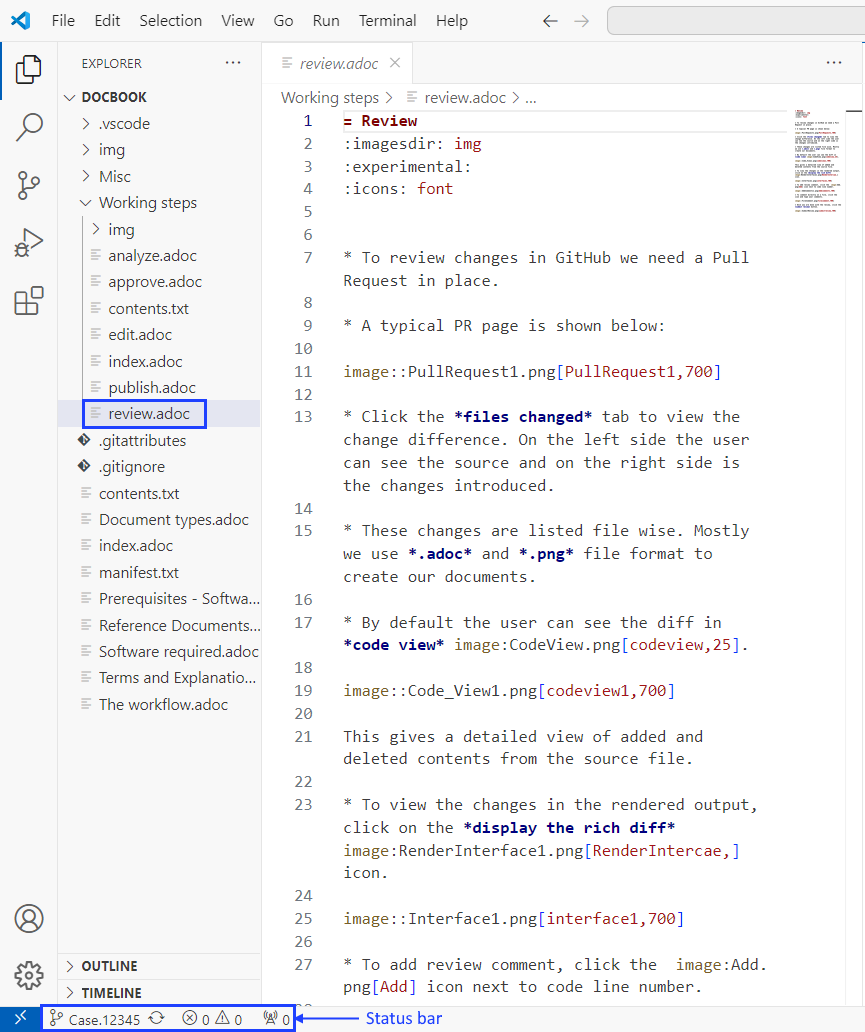
Visual Studio Code will launch. Check the branch details in the status bar at the left bottom corner.
-
-
Select and edit your .adoc file in Visual Studio Code and save the file after making changes.
-
In the Command Prompt, type
bento .to compile the .adoc files.-
During the Bento compilation, a new HTML folder will be created for the document folder.
-
Navigate to the HTML folder, review the HTML files.
-
-
In Command Prompt, type
git statusto check the modified files. -
Type
git add .to stage the changes. -
Type
git commit -m "write description here"While writing the commit message description, follow this naming convention Case 12345: Your message -
Type
git push-
Follow the Command Prompt instructions to add the new branch (one-time process). The following instruction will be displayed when the
git pushcommand is entered.
-
To push the current branch, copy and paste this in Command Prompt
git push -set-upstream origin Case.12345This git push -set-upstream origin Case.12345command pushes your local branch to the remote repository and sets the upstream (tracking) branch. This means that future git push and git pull commands will default to this remote branch.
-
-
Next, go to GitHub's respective repository in your browser and click on Compare & pull request.
-
Add a title and a description to create the new pull request. Follow the below convention,
-
Title: Case 12345: <Add FogBugz case title as pull request title here>
-
Description: Add the commit message description here, along with any details that you want to notify to the assignee.
-
-
To select the assignees, click the gear icon to view the list of people. Then, click Create pull request to proceed.
-
Once assigned, the assignee begins to review the changes.
| To know more on the review process, please refer to proofread. |